List Of Blogs > Liferay Objects
Shaik Ali
Liferay Objects
Using Liferay Objects, you can develop fully integrated applications without the necessity of constructing modules through the service builder. This approach eliminates the need for module creation while facilitating the seamless creation and deployment of objects within the Liferay environment.
The subsequent steps outline the process of creating and publishing Liferay Objects:
1. creating an object definition.
2. Proceed to edit the object's draft mode, where you will incorporate fields, define validations ext.
3. Once the object is refined, the final step involves published it.
To Initiate the procedure of creating an object definition in draft mode, follow these steps:
1. Access the Global menu and navigate to the control panel.
2. Within the control panel, locate and select "Objects."
3. Commence the creation of a new object definition by clicking the "Add" button.
4. Provide the details for the object definition, including labels, plural names, and object names.
Label: This label value will be shown in objects admin and other places like workflow, form ext.
Plural Label: It determines the display name for the object in UI.
Object Name: It determines the Object definition name. And it cannot be update once it published.
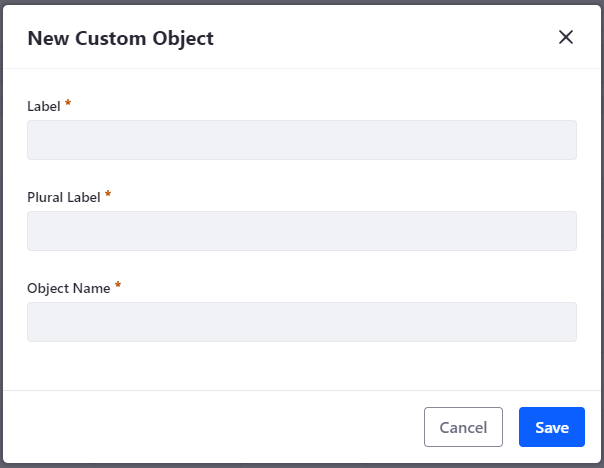
5. Once saved the object definition creation will be in draft mode without any configuration.
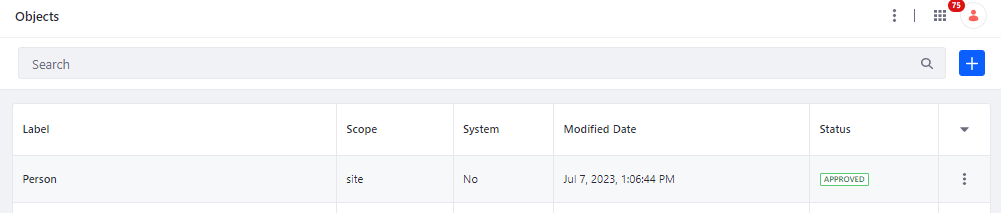
The added objects will be displayed in the Objects admin page with a draft mode.

Edit the objects.

In the "Details" tab of the object, you will need to modify the object's scope. There are two available options for scope: "Company" and "Site."

"Company" (default): If the scope is set to Company, the object data is stored per Liferay instance.
"Site": If the scope is set to Site, the object data is stored per specific Site.
Following that, navigate to the "Fields" tab. There are already some system audit fields present (ID, Author, Create Date, Modified Date, Status, External Reference Code). Additionally, you will need to add custom fields. Each of these fields corresponds to a database column intended for storing a specific data type.

Publishing an object result in the creation and activation of your new application. After published the object status will be in Approved.
Shaik Ali
